Having a fussy eater can be challenging at times. Which is not to say that my little guy is one of those “will only eat chicken nuggets” types. I have seen him cheerfully tuck into a bowl of smoked salmon chirashi because he knew that he liked all of the components (smoked salmon, julienne carrots, sesame seeds, rice, soy sauce), but for some reason we have been having difficulties with lunch. He just doesn’t want to eat it unless it involves getting in the car and driving through someplace. I think it might be less about the eating and more about the going (I cannot play with him non-stop and he takes it personally).

But obviously we cannot go out every, single day so I really needed to come up with a solution. After multiple rejections of food items I decided to take a radical approach and ask him what he would eat every day for lunch. He pondered this and said “Squishy bean quesadilla.”

This kid is a bean maniac. He has not met a bean that he did not like. It started off with black beans but we then went to a Mexican place that did not have black beans but instead served him the more traditional refried pinto beans. These have been officially dubbed “squishy beans” and are now in the rotation as well as being his preferred filling for quesadillas.

The internet seems to think that it is perfectly fine to freeze quesadillas so I figured I would do a bit of batch cooking to save some time and money. The money part comes in not throwing away a partial can of refried beans. Historically we have cracked open a can and kept it in the ‘fridge to use as we went; but it has consistently gone bad before we manage to use the whole can. It gets shoved around and hides behind the mango juice and then we have this crusty mess that goes directly into the gar-bahge. By making as many quesadillas as the can can handle (heh, can can) we will be avoiding that waste.

Large batch quesadilla making for the freezer

Cooling their heels

Refried Bean Quesadillas

The Hardware: sauce pan, griddle or large frying pan, offset spatula or butter knife, cooling rack

The Software:
1 can Refried Beans
8 Whole Wheat tortillas (soft taco size)
1 8 oz bag Quesadilla Cheese
Cumin and garlic powders
Oil or butter for browning

Set up both a staging area and a cooling area to make assembly line production easy.

Crack open the can of beans and scrape them into your sauce pan, they will fight you but you must be strong. Marvel at their ability to maintain a can shape and then stir them up on medium low heat. Add cumin and garlic powder to taste and stir until they are heated up and easy to spread. Remove from heat and place at the beginning of your assembly line along with your cheese and tortillas.

Now, I love my electric griddle and when it dies it will receive  a proper sending off just before we get a new one. It is perfect for making pancakes, french toast, grilled peanut butter & cheese sandwiches (separately, not peanut butter & cheese in the same sandwich shudder), hamburgers … you get the picture. And I cannot imagine tackling batch cooking like this using only a single skillet. But if that is what you have then go for it.

Heat up your cooking implement of choice and grease it up with a bit of oil. I used a folded paper towel with oil to re-oil between quesadillas. Take each tortilla and spread 1/8th of the beans on 1/2 of the tortilla. We are making folded quesadillas and this will make things easier. Place as many 1/2 beaned tortillas on your cooking surface as possible and then sprinkle your cheese on the non-beaned half of the tortilla. Allow to cook until the cheese starts to melt a bit and then fold in half.

Arrange the folded quesadillas so that they are taking up less space and add another 1/2 beaned tortilla to the griddle. Put cheese on it and check the folded ones. As they become brown on one side, flip them to the other. When both sides are well browned, remove them to a cooling rack. Continue folding, rearranging and removing quesadillas until you have added cheese and cooked all of them.

Once fully cooled, place in freezer and freeze until solid. Transfer to a big ziplock bag or something like that. I bet you could wrap them individually in foil too. I haven’t reheated any yet but there are various reheating options. I plan on reheating from frozen in the oven, probably for about 20 minutes at 350F.

The Results:

I will report back after I have served one from frozen. I am pretty confident that it will be quite tasty. If you want you could totally add some other ingredients. I bet sauteed onions would be awesome, or perhaps chicken or another meat. I would add them at the same time I added the cheese.

What do you like in your quesadillas?


It turns out that my bulk mashing post is one the more popular posts on this here blog. It kind of makes me feel better about myself knowing that there are others out there that cannot resist the bargain bag of ‘taters even when we know darn well that we cannot eat the whole thing before it goes over to the dark side.

But this time it wasn’t my fault – it was totally my Mom’s fault. You see, just after the holidays they pull up stakes and relocate to warmer climes which leaves me as the beneficiary of the “cleaning out of the perishables”. Not that I am complaining, free food – especially a staple – is always welcome in my home. And yet I found myself, once again, staring at the lumpy proliferation of tasty tubers in my pantry.

Which sat in my pantry.

And sat.

Until I said CRAP I gotta do something with those ‘taters. So I did, about a month ago (what you thought I had magic ‘taters that lasted from the end of December until February? – no chance, not with our humidity), but I waited to let y’all know until I had fully tested my plan. Because I don’t want to pass on any crappy advice, I have standards you know?

Like mashed potatoes - only you are supposed to eat a whole bowl.

The Initial Spud Soup Starter

The Hardware: A big honkin’ pot, immersion blender, ladle and quart freezer bags

The Software: A metric butt-tonne of russet potatoes and enough stock to cover, plus whatever spices you like.

Take your ‘taters, peel then chop them into chunks – toss them into your big honkin’ pot. Pour in enough chicken stock to just cover the spuds. If you are a vegetarian type person, I am sure that a vegetable stock would work. Cook the ‘taters until they can be easily poked through with a skewer and turn off heat. Now here is where we get crazy.

Don’t drain them.

Take your handy-dandy immersion blender and puree the tar out of those ‘taters. What you will end up with is something much to runny to be mashed potatoes but much too thick to be actual soup. I call this “soup starter”. You can season at this point – until you like the taste, but be careful with the black pepper. Black pepper intensifies even in the freezer. You can always add more seasoning later – but it is tough to fish it out. I added salt, a little bit of pepper and some garlic powder. Hmmm, I wonder what would have happened if I had cooked some garlic cloves with the ‘taters? Next time maybe.

The important thing here – do not add any dairy. No milk, no butter, no cream cheese, no sour cream, no cheese. These things do not freeze terribly well in a team environment. They like to go their own way, to seperate themselves. Bust out your ladle and fill up as many quart freezer bags as you can manage. Try to get as much air out of them as possible and lay them flat on a tray. Make sure you label & date them and then chuck them into the freezer. Freezing flat makes it easier to store the bags after freezing and makes the food thinner and more widely distributed; therefore easier to thaw.

The Spud Soup

This is why it took a month for me to post this – I wanted to make sure it worked. I had significant concerns about the texture of the soup after the freezing. Luckily I was able to thaw and revive our patient with little quality loss. Score one for Cryogenics!

Pull out a freezer bag of your soup starter and microwave it on very low until you can mush it around enough to decant into a large saucepan. Once the soup is in the saucepan – heat on low, stirring and mushing frequently until everything is thawed (or almost thawed, if you are like me an have no patience it will still work). Thin the soup to slightly thicker than desired consistency with stock (of whichever persuasion floats your boat).

If you are a vegan and used vegetarian stock – well, I cannot help you much beyond this point – it is going to get ugly for you so you might want to stop. The next things you want to add to bring your soup to it’s final luscious consistency are those prima-donnas who eschewed the freezer, milk and butter – the dairy divas. Add as much as you want – I won’t tell.

Season to taste, I like salt and a good bit of pepper, plus some more garlic and a wee bit of nutmeg. You follow your bliss. In the above picture you might notice some lumps – I actually dumped in some frozen corn because really, can you ever have too much starch?

Toppings can be applied with wild abandon. Personally, I cannot conceive of potato soup without bacon and cheese. While we were eating I mentioned to the hubby that some caramelized onions would have been delicious piled on top. If I had had a can of French’s onions handy – I can guarantee you they would have made an appearance.

What do you think would go well on top?

A post, a post! A post that is actually on topic! Making your own convenience foods, one easy place to start is with the humble potato. I love potatoes, in most any form I love potatoes. When your grocery runs a special, 10 lbs of potatoes for $3.50 and you are only feeding 2 – 3 people it is hard to take advantage of the bargain. Because a bargain isn’t exactly a bargain if it rots in your pantry. And that is what my 10 lb bag of potatoes was thinking about doing.

When you realize something is on the brink of going to the dark side what do you do? You do something with it! Don’t let it go to waste.

Having used 5 or 6 of the potatoes in the hulking bag of tubers I was faced with the need to Do Something with them before they went all Darth Vader on me. I was heating up the oven to make dinner, so I went through the bag and picked out the most pleasingly formed of the bunch. Your classic “baking potato” shape that is so happy sitting beside a steak. Wash, dry, assault with fork, rub with oil and sprinkle with salt – chuck directly onto the oven rack at about 375 until done (about 45 minutes).

While the bakers were baking I washed, dried and mostly peeled the rest of the bag. Cut into chunks and tossed into a large pot with enough water to cover I boiled them for about 20 minutes – until tender. Drain and return to the hot pot to allow some of the water to steam off (low flame can help if you need it).

I left those hanging out and removed the bakers from the oven. Then I went and watched Cars for the 2,345,24354,374th time with the Eman. Once he was down for the count I started the serious cooking. Cut the bakers in half longways and scooped out the flesh, careful to not pierce the skin and leave enough of a shell of ‘tater so they could stand up on their own. The ‘tater innards joined the boiled ‘taters in a large bowl (actually the bowl of my Kitchen Aide mixer) so that they could fulfill their special purpose.

******’tater fest 2009******

Is there a more comforting food?

Is there a more comforting food?

I have never mashed quite this volume of ‘taters before, but  it pretty much works the same way as always. Scald some milk, melt a stick of butter, salt & pepper to your heart’s content. Mix, mix, mix, using your spoon to redeposit the escapees (because my mixer was just that full). Once you have achieved mashed ‘tater Nirvana then you are ready to proceed.

I removed what I felt would be enough mash to refill the baker shells and then added some cheese, green onions and garlic powder to the mix. Spoon the mixture back into the shells, filling only to the top the first time around; and then topping off with the remaining mixture so that they are overflowing.

Here is where the amazing part comes. Place all of the filled baker shells on a sheet pan and deposit in your freezer. Allow them to freeze overnight and then wrap them individually in plastic wrap. Put them all in a freezer bag and you have your own – home made – frozen twice baked potatoes. When you are making a meal pull however many you want out of the freezer and put them directly into the oven (on a pan) with whatever else you are cooking. Cook until they are hot all the way through and browning on the top. I baked 7 potatoes so now I have 14 twice baked potatoes in the freezer.

The remaining mashed ‘taters? Those can be frozen also. I use quart freezer bags and fill them with what I consider a “family sized” portion, partially zip the lock and squeeze as much air out as you can. Once your bag is sealed lay it down on it’s side and squish the ‘taters out until you have a flattened layer around 1/2 inch thick. When you freeze flat like this it is much quicker to thaw whatever it is you are freezing, and you have the added bonus that you can stack things in your freezer. Or file them like they are in a hanging file. You can either thaw them in a simmering bath “boil in bag” style or cut the bag off and nuke their little spuds hot. I tend to nuke at 50% power, a few minutes at a time, stirring a couple of times in the process.

I ended up with 3 quart bags with a “family sized” portion in each. So, 14 2x baked potatoes and 3 meals worth of mashed potatoes all stashed in the freezer. And how much did it cost me? If you add in the butter, milk, cheese and green onions it might total $5.00.

$5.00

Isn’t that kind of savings worth a couple of hours in the kitchen? Don’t forget to add in the time you will save when preparing future meals featuring these ‘taters, you’ve got side-dishes for at least 6 meals for a family of 4, more if you are like me and only feeding 2.

Update! So I have been watching my stats to see what is bringing people to my site and apparently I have been attracting people who, like me, cannot spell Avgolemono correctly. Heh. So I thought I would add this and see if I can catch people who can actually spell. And just for kicks lets say “Greek Chicken and Lemon Soup”. HaHA take that Google analytics. 7/30/09

Now Back to Your Regularly Scheduled Post

In the recent months I have seen numerous posts in the food-blogoverse singing the praises of homemade stock, and I couldn’t agree more. It is an awesome thing to have around, and the feeling of satisfaction I get from making something delicious out of stuff that is pretty much garbage is wonderful. But, I am not going to tell you how to make stock.

Many people have done it much better than I have. For my most recent stock making endeavor I made use of advice from Michael Ruhlman. I didn’t try his oven method, I think that might work for a big manly man like him who doesn’t have a problem moving around a large stock pot full of very hot liquid, but I did avoid allowing any bubbles. I brought the stock up to 180 – 185 degrees and then reduced the flame to low so it would stay there for … oh … 5 hours or so.

Also from his tips, I didn’t put the veggies in until the last couple of hours of cooking. This didn’t seem to effect the flavor and it made the straining much easier because the veg didn’t disintegrate. Speaking of straining, in the past I have tried the flour sack cloth and the cheese cloth and they both end up being a pain in the butt. But one thing that I always have laying around the kitchen is coffee filters. They fit perfectly in my hand strainer and allow me to strain the stock only once. So there, I do have a secret for you. Another little secret that I have is that I like using coriander seeds in my stock. But I do not like straining out all of the seeds and stuff, so I cram it all into a tea ball that I have and let that dangle off of the edge of the pot. Because who has those fancy pants sachets hanging around?

Most of the stock that I make goes nigh on directly into the deep freeze, but I always like to make something a little special to use it when it is fresh. And I never have enough freezer boxes to freeze it all. What can you make that really showcases the flavor of your newly minted stock?

Golden, Liquid Love

Golden, Liquid Love

If you have some dumplings hanging out in the freezer now would be the perfect time to make chicken and dumplings. But I sent my last batch away with the Hubby so he could have some home cooking away from home. So instead I made Avoglemeno Soup, also known as Greek Lemon Soup in Joy of Cooking.

Avoglemeno Soup: adapted from Joy of Cooking

The Hardware:
Saucepan, liquid measure or small bowl.

The Software:
3 C Chicken Broth
3/4 C Cooked Rice or raw Orzo
2 Eggs
2 – 3 T Lemon Juice

1) Put broth in saucepan and add rice or orzo. If using rice, you just need to get it to a simmer, if orzo – cook until tender. If you are using orzo you will probably need to use more stock because some of it will boil off.

2) Make sure you stock tastes good, I like to add some granulated garlic at the beginning to give it time to bloom. I think it makes it tasty, also consider adjusting with salt and pepper to your taste.

3) Put lemon juice into liquid measure (or the small bowl, but something with a spout is really better for this). Break in the eggs and beat with a spoon until a consistent color.

4) Turn the heat off of the soup and stir swiftly. Pour the egg/lemon mixture in a thin, steady stream and try not to hit the stream with your spoon (DON’T CROSS THE STREAMS RAY). Continue pouring until it is all in and the soup has gone all opaque and stuff. Serve and devour.

Hacks:

You can add lots of nummy stuff to this soup. Some people add greens (spinach and the like) and I have been known to put diced carrots in, so that I can pretend that I am eating vegetables. If I am feeling like a thicker soup I have been known to add a third egg. But I love the eggy goodness. Once I even added meatballs – but I guess that makes it some sort of bastardized Italian weddingglemeno soup.

So, what is your favorite thing that shows off your mad Stock making skillz?

For the last year or so my toddler has eaten French Toast every morning for breakfast, his Daddy makes it for him. One egg makes 2 pieces of French Toast, so Daddy eats a piece with the E-man, and this has lead to the evolution of a ridiculously cute ritual. The slices are put on two separate plates and both are cut up in bite-sized pieces. Both get butter and syrup, one gets a big boy fork and the other a plastic toddler fork. Daddy sits down at the table and places the plate with the plastic fork in front of the E-man and the other in front of himself. The E-man evaluates the situation and reaches over to snatch the plate with the big boy fork. He proceeds to eat all but the edge pieces of the Toast and then switches the plates back so he can have a go at the middle pieces of his Daddy’s piece. Daddy ends up eating all of the edges and whatever is leftover from the second piece.

I don’t think I need to go into how happy it makes me to peek into the kitchen and see my boys, the big one eating with a plastic fork that barely protrudes from his hand and the small one with a fork as long as the diameter of his head. Of course things have changed, the Daddy has had to take work out of state and I am now in charge of breakfast. In charge of everything in fact.

I have been wanting to change up the E-man’s breakfast with different foods, but have been reluctant to disrupt the ritual. Now, all bets are off, and frankly I have been trying to lose weight. French Toast with maple syrup every morning is not going to assist in that endeavor. Also on the agenda is to get more veggies into the E-man. So I started poking around for a Pumpkin pancake recipe.

I couldn’t find one that made me particularly happy so I ended up making up my own. One of the primary requirements was that I wanted to be able to make the batter up last night so that all I had to do this morning was cook the durn things. They came out pretty well:

Magical floaty pancakes

Magical floaty pancakes

Pumpkin Pancakes

The Hardware:

Non-stick skillett or griddle, spatula, lidded mixing bowl.

The Software:

A-Team
1 C AP Flour
1/4 t Salt (kosher)
1 T Baking Powder (can be cut back to 2 t to reduce saltiness)
1 T Brown Sugar
1/2 t Cinnamon
Pinch Allspice

B-Team
1/2 C Milk
1/2 C Pumpkin (canned)
1 Egg
2 T Veg. Oil
1t Vanilla Extract

Butter & Syrup

1) Look through your pantry and realize that the can of Pumpkin that you thought you had in there has magically turned into Butternut Squash. Decide there really isn’t much of a difference and proceed.

2) Combine Team A in a seal-able bowl that you can put in the ‘fridge.  I used a whisk to get some good faux-sifting done.

3) Combine Team B in something else. I used a liquid measure because it makes it easy to, well, measure. To stir I used the same whisk as used previously, because I don’t like to wash dishes.

4) Add Team B to Team A and stir gently to combine, just until you have made sure the flour is worked in. Do not over-stir and do not worry about lumps. The overnight thing will take care of them. Cover and put in ‘fridge overnight.

5) Place skillet/griddle over medium heat and allow to get hot. Once hot, reduce flame (or fancy pants electricity) to low. Take a stick of butter and run the square face of it around the pan, just to get a light coating of butter. Add pancake batter to make 2 – 3 inch diameter pancakes. Don’t poke them. Let them sit there until you start to see bubbles coming up through the batter and the surface starts to get a kinda “skin”. Scoot your spatula under and see if it looks done. If so, flip gently. The second side will not take as long as the first side. Peek with your spatula to make sure it doesn’t burn. Repeat until all batter is used up. I got 9 small pancakes.

6) Serve with butter and REAL Maple Syrup. Yes, I am a snob.

Hacks:

I have 3 pancakes in the ‘fridge and 4 in the freezer as we speak (the E-Man ate one and one had to be for quality control so no, my math doesn’t suck) (well, actually my math does suck the vast majority of the time, but not in this particular instance). I will keep the internet posted as to how the different cooling approaches work out. I think they will be fine. The plan is to warm up a Pancake each morning, this way I have to cook once a week as opposed to every morning. YAY lazy!

I am pretty sure you could double the recipe with very little problems and of course you could use pumpkin if you were so inclined. I also think it would be tasty with sweet potatoes, mmmm.

Update 2/12/11!

We have been using this recipe now for, WOW, almost a year and a half. It has performed admirably. My son is bigger now and he has matching appetite. We now double the recipe (with the reduced Baking powder) and make more pancakes to get us through the week. I lay them out on a cookie cooling rack and then put them in the freezer flat on a cutting board. Once frozen we pack into an airtight container.

Reheating usually involves a short stint in the microwave @ 50% power and then a quick jaunt through the toaster to crisp them up. Served with maple syrup they are quite tasty. The most common flavor we use is pumpkin, but when pumpkin is not available sometimes pureed sweet potatoes pinch hit.

On occasion, when I am feeling especially virtuous, I substitute white whole wheat flour for half of the flour and it works fine.

Freezing cold that is.

Apparently my thoughts are presently fixated on freezing stuff, so I thought I would share some other oddities that I have lurking in the smaller half of my ‘fridge.

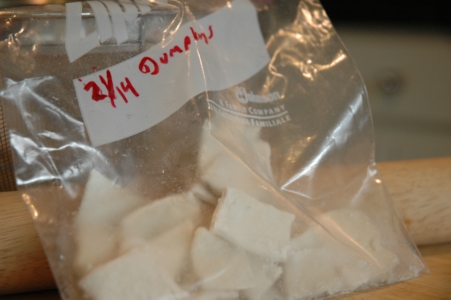
You try to take a better picture of a bag of frozen dumplings, I dare you.

You try to take a better picture of a bag of frozen dumplings, I dare you.

These are dumplings, not those poufy, Bisquick style drop dumplings but the flat kind. I have decided I prefer these to the big fluffy kind that you eat and they sit in your stomach and bully any of the food that you eat later. They make it sit in the nosebleed section of your stomach and crowd your esophagus and then you get the acid reflux. And I don’t like the acid reflux.

But I like chicken and dumplings, and turkey and dumplings, and meatballs and dumplings (what? I had some leftover meatballs!) These little guys are kind of like the noodles in your chicken noodle soup on steroids. So much so that I think the next time I make them I am going to cut them into long, skinny rectangles instead of square-oid shapes.

I try to always have homemade chicken stock on hand, but if I don’t I like “Better Then Bullion” just fine. Bring some stock up to heat, grate in some carrots and chuck in some shredded chicken and you have yummy soup. And if you have these dumplings in the freezer you have Souper Soup.

Flat but Tasty Dumplings

1 C AP Flour
1/4 C Milk
1/4 C Water

Salt, Pepper and Granulated Garlic to taste I use 1/4 t each of Salt & Granulated Garlic and a goodly amount of pepper.

1) Combine flour and spices in a bowl and whisk together. Add liquids and stir with a wooden spoon until it comes together enough to turn out onto a floured surface. Knead gently, adding flour until you can handle it fairly well. This is a soft dough but you want to get rid of the stickiness.

2) Cover with a towel and allow to rest for 10 minutes. On a well floured surface, roll out rested dough until it is the thickness of a knife blade. You will most likely need to add more flour to make it workable. Using a pizza cutter, cut into rough polygonal shapes (the original recipe said 2 inch squares but who the heck am I kidding? And I thought 2 inches was too big anyway).

3) If you are making the soup right now, save enough for the number of servings that you need. Remove the rest (or all if you aren’t making soup) to a flat plate or cookie sheet covered with waxed or parchment paper. Check to make sure the plate/sheet that you are using will fit into your freezer. Don’t ask me why I feel the need to give you that tip, I just do.

4) Make sure that the dumplings do not overlap and freeze them for several hours or overnight. Once frozen, peel off of paper and place in freezer bag – squishing out as much air as you can. These can be thrown directly into simmering soup. Fresh dumplings take about 10 minutes at the boil, frozen a bit longer – just stop when they are done. This recipe can be doubled easily and it makes a ton of dumplings.

I like cheese.

One of my strategies to save some money and eat a bit more consciously is to reduce the amount of meat in our diet. We do this by having many vegetarian meals, but also by reducing the portion sizes of meat in the meat meals we do eat. I have found that one way to alleviate the feeling of “missing meat” in a dish is to add some cheese. Cheese always makes a dish feel special and luxurious (at least to me).

It is also a good source of protein and flavor and you can keep it on hand for a long time. You can also freeze many cheeses with little quality loss. But it can be an expensive item so I have had to work out some work arounds.

My local grocery store regularly runs a special on their store brand cheeses where you can buy three 8 ounce bags for $5, which is a pretty good deal compared to regular price. I would stock up on Quesadilla, Cheddar and Mozzarella cheese when they went on sale and chuck the extra bags in the deep freeze.

By the way, do you have a deep freeze? If not you might want to consider acquiring one. They really are an invaluable tool for food savings because of the very subject of this post, buying in bulk. If you think you do not have the room or the money you might want to do some research on deep freezes. You can find small ones about the size of the ‘fridge you had in college for well under $200 like this one:

Hmm, sidetracked…

Back to cheese. While my grocery store deal is better than buying full retail, we can do better. At the “Membership based wholesale club” that I go to I was able to find 5 lb bags of both shredded Mozzarella and Cheddar for about $9 per bag. And believe it or not, the shredded was cheaper than any of the block cheese prices that they had. So buying and shredding myself would not have saved any money.

I brought my booty home and proceeded to divvy them up into quart sized freezer bags in 8 oz increments. Why would you waste time on doing that you might ask? Well, my reasoning was threefold:

1) I usually buy cheese in 8 oz bags and that fits nicely into my ‘fridge’s deli drawer.

2) If I left it in the large bag then I would be tempted to use way more cheese than I need to because HEY LOOK HOW MUCH I GOT!!

3) Air is what damages frozen food, so repeatedly opening and closing a big bag of frozen cheese would cause faster deterioration.

Each of my 5 lb bags split up into ten 8 oz bags of cheesy goodness (talk about your higher math there). I tossed one of each flavor into my ‘fridge and put the rest into the freezer. It took me about 20 minutes to get it all done and I saved $6.00.

How did I figure that? Now is the time for the actual higher math.

3 – 8 oz bags of cheese for $5 = $1.60 per bag, 10 bags = 5 lb so:

10 x 1.60 = $16.00

$16.00 – $9.00 = $6.00

Yay! $6.00, don’t scoff. Think how many .10 coupons I would have to clip to save $6 bucks. But really, things can add up. Plus I have the convenience of knowing that if I run out of cheese I can saunter down to the freezer and pluck a bag out and be ready to go.