Vacation time is over. If one can call all the doings in September a vacation, frankly I am glad it is over. Risking sharing too much with the wide wide internets – I am calling September a vacation because my husband wasn’t working. It wasn’t voluntary on his part, and I am ecstatic he is back to work. The less said about that the better.

But because of the vacation I found I needed to concentrate on things other than blogging. But now that I have some time to myself – the blog has returned! Just in time for October’s Can Jam.

Pepper jelly is nothing new, not even for this blog. And I really didn’t feel like making it yesterday. But you know what I did feel like? I felt like eating it for the coming months. There is no way I am actually going to go and buy pepper jelly – so a canning we will go.

Lucky for me I have a next door neighbor who is a true Southern Gentleman. An older Gentleman who has been planting “gardens” all his life. “Gardens” that run into the acre plus size range. Now that he is older he does not need the food he grows, nor does he have the desire to even harvest the food he grows. But he likes growing it, so I oblige him by harvesting some of that which would normally go to the critters.

See how I turned that around there? Like I was doing him a favor. In reality I am spoiled rotten by his generosity and try to get him to take as many jars as I can – but he lives alone and won’t take much. But I try. He also seems to like to keep my life interesting, because as I was harvesting the pepper plants he said – “Oh, be careful. There are some hot ones in there.”

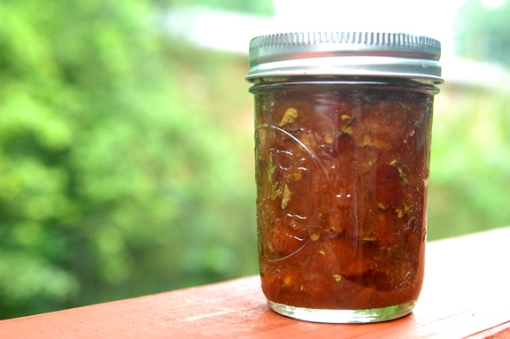
For this year’s batch of pepper jelly I decided to try something different – Pomona’s Universal Pectin. Since I cannot bring myself to bust into a jar that I just canned – we don’t know how things worked out texture and flavor wise. But I can show you the most obvious difference right away.

Banana Pepper Jelly

The one in the middle is from last year.

The calcium makes the jelly “cloudy”. You cannot get the crystal clear set jelly like you can with regular pectin, or using apples. Oh well, guess I won’t be winning the State Fair. Please pardon the weirdness of the photograph. My computer is pushing up daisies and I am having to make do with unfamiliar editing software. Holy color burn batman.

Whatever Pepper You Have Jelly

The Hardware: See the Canning Thing, about 7 pint jars for a double recipe, or a combo of jars to hold 7 pints and fit in your canner in one go.

The Software: this is the basic recipe with regular commercial pectin

3 C Peppers – finely chopped
1 1/2 C Apple Cider Vinegar
6 1/2 C Sugar
1 Pouch Liquid Pectin
1 T Butter

Wash, stem and seed peppers – WEAR YOUR GLOVES REGARDLESS OF HOW MANLY YOU ARE – cut into largish chunks and then toss in food processor to make wee bits. Put peppers, sugar and vinegar into a big pot and bring to an aggressive simmer. Cook for 5 minutes then crank the heat up to get a full rolling boil. Add butter.

While you are waiting for this, take your pouch of pectin and cut the top off, place it in a small glass so that it can sit upright and not ooze all over every-which-way. You’ll need your mad lightening fast kitchen skillz soon.

After you have reached a full boil, grab that handily pre-opened pouch and squeeze the whole thing into your pot – stirring maniacally. Back off on the stirring a bit when you realize that you are overdoing it. Return to a rolling boil and time for 1 full minute then turn off the heat. Do the canning thing, 1/4 inch Head space and BWB process for 10 minutes if you live on the beach. And if you live on the beach I kinda hate you because I don’t. Add a 5 minute penalty for every 1,000 miles in altitude you live above the beach.

Cha, cha, cha, changes …..

The bonus of the universal pectin is that it does not require sugar to set. Regular commercial pectin sets by a reaction of the pectin, acid and sugar content of your mix. If you get any of this off then your set is in danger. There are low sugar setting pectins available, but there isn’t much wiggle room in them either. The universal pectin sets by the chemical reaction between the pectin and calcium. Your package comes with both and instructions on how to make the calcium water.

It also comes with the encouragement to “make your own recipe”. Holy CRAP when does a canning recipe ever say that? And I am sure they mean within safe acid guidelines.

So, here are all the changes I made to use the pectin and some bonehead issues that I faced. And I doubled the recipe. Heh.

Fancy Pectin Banana Pepper Jelly

6 C Banana Peppers, chopped small
4 C Apple Cider Vinegar
9 1/2 C Sugar
5 1/2 t Powdered Universal Pectin
2 T Calcium water
1 T Butter

There are a few changes to the process, you need to measure out a separate bowl with 1/2 C sugar in it and mix the pectin in with that. Put the peppers, vinegar and calcium water in at the start and cook as stated above. When you reach the boil, back off a wee bit and then add the sugar with pectin – stir well until everything is dissolved (at least a minute or 2) then when you are back at a boil, add the rest of the sugar (stirring maniacally) and bring back up to a boil. Add the butter after you get all of the sugar stirred in. Watch for big freaking lumps.

Process as usual.

The Results

No clue. It appears to have set up, but it is possible that it is rock hard. Last year’s batch I used a combination of Banana Peppers and Jalapenos, this year I had only the Bananas (with possible stealth spicy Bananas). We will see … we will see.

Do y’all want to know how I use pepper jelly in my cuisine? I have some secrets.

Finally in the zone, the canning comfort zone. Really, for most people isn’t this why they got into canning in the first place? Solanum lycopersicum, the garden tomato. When reading through plant catalogs it is the siren of summer, with her beguiling aliases: Mortgage Lifter, Brandywine, Cherokee Purple, Cuore Di Bue, Green Zebra … She seduces you into ordering dozens of plants with the anticipation of this very moment, the canning of the tomato.

Was there ever any doubt what this month’s can jam theme would be? It had to be her. And as comforting as this ingredient is to me, it was still hard. Hard to do something other than make sauce. Because I horde sauce. I dream of sauce. I have nightmares about running out of sauce. There can never be enough sauce in my larder to make me think that I have enough.

But sauce is pretty boring, and I wanted to do something a little interesting. Not all like crazy weird I’ll never use the product, but something a little more complex. So I allotted some of my precious tomatoes to this task – and if tasting is any indication it was an acceptable gamble.

Canned Pizza Sauce

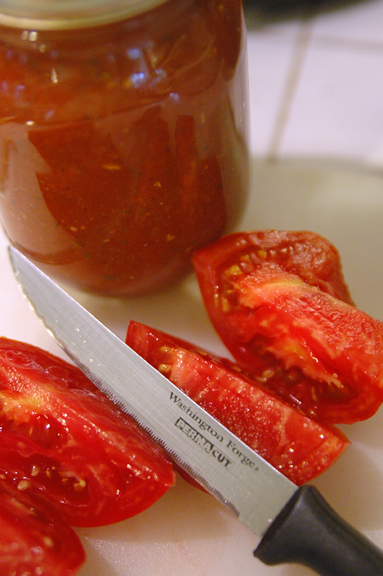
The Hardware: see The Canning Thing, 3 – 4 pint jars (or any combination of half pints and pints to hold between 3 & 4 pints), food mill, potato masher and a cheap a$$ serrated knife. Now, I don’t usually spend a great deal of time on hardware, I just assume if you are cooking you know what you like to cook with. But I want to take a moment to talk about cutting tomatoes.

I am a knife snob. Sharp and strong is the way I like them, I don’t have many but the ones I have are choice. All last year during tomato canning I worked with a combination of my Henkel paring and bread knives, using the paring to cut out cores and such then the bread knife for cutting the bad boys into pieces. This year I had a rude awakening. I realized that the cheap block-o-knives steak knives that my hubby brought into our relationship, the ones that were relegated to the gulag of the junk drawer, were the best knives to use for processing my tomatoes. The pointy tip will cut out bad spots and the serrated “never sharpen” edges saw through tomatoes like buttah. I am chagrined.

Cutting up tomatos

Oh the shame.

The Software:
10 lbs Tomatos
4 Cloves Garlic, mashed
2 t Oregano, dried
3/4 t Black Pepper
2 t Italian Seasoning herb mix
3 C Chopped Onions
2 1/2 t Salt
3 T Brown Sugar
1/2 t Garlic/Chili paste
1 T Lemon Juice per pint

Remove cores and bad spots from tomatoes, slice in half or more depending on size, chuck into goodly sized non-reactive pot. Sprinkle with a bit of salt and squoosh with a potato masher. Bring to a simmer and cook until you can mash the biggest piece on the side of the pot with a spoon. Run through food mill and return to pot. Feed all scraps to chickens.

Add everything else except the lemon juice to the pot and simmer until the onions are soft – run through food mill a second time. (You might want to hold off on the chili paste and add that to taste depending on how spicy you like things.) Return everything to the pot (including the stuff that wouldn’t go through the mill – I like chunkies) and simmer until reduced to desired thickness. You know, pizza sauce thickness ie: thicker than a standard sauce but not paste consistency.

Add 1 T of lemon juice per pint and 1 1/2 t for a half pint – fill using your fancy canning gear and stir up a little to mix the lemon in before you lid up. 1/4 inch head-space, Boiling Water Bath for 35 minutes (sea level) adjust for your altitude.

Am I happy?

Yeah, I am happy I made this. Now I can have instant pizza sauce whenever I desire. It was hard, because for that 10 lbs of tomatoes I could have had 4 – 5 pints of sauce. The reducing kills me, I feel like I am simmering away precious tomato goodness. But I know that is silly.

Unfortunately my tomato plants are not producing as I would like this year. I managed to pull this off with home-grown, but if I am to have a larder that will allow me to sleep at night I might have to resort to the farmer’s markets. Tell me truthfully, for you, how much is enough? Do I have a problem?

ps: If I had known then what I know now, I might have held off on my Salsa Verde post and put it here instead. I am afraid that the tomatillo isn’t going to get the face time it should in this months round-up. The green stuff vs the red stuff is a Sophie’s Choice kind of conundrum for me. So take a moment and give some love to the little green guy.

I asked for it.

In my last Can Jam post for tigress I added a post script, throwing it out there to the canning gods that I would (pretty please with sugar on it) really like for the next jam to include cucumbers. And lo, the canning gods (or at least the goddess over at Laundry Etc) heard my appeal and were generous.

You know what other things in my life were generous – my cucumber vines. They were so crazy that I had a hard time keeping up with their production. Did you know that if you leave a cucumber on the vine long enough it will get gigantic and eventually turn orange? Well, I do now.

Luckily the chickens like overgrown cucumbers – the seedier the better.

To deal with the deluge of cucumbers my mother came over last week and we had our own little pickle jam. It took most of the day but we put up a double batch of Bread & Butter pickles (totaling 12 pints) and a little experiment for me. I only got 6 jars of the B&B’s but all of the experiment, because mom just doesn’t roll that way.

If you want to make the B&B’s check out this previous can jam post on onions. Instead of 16 cups of onions, go with 15 cups of sliced cucumbers and 1 cup of sliced onions. Volia – two for one recipe.

But on to the experiment (I don’t have a picture yet – but tigress asked us to get things up early(er)than we usually do – photo to come done). From my trusty tome on canning The Complete Book of Small-Batch Preserving I busted out with something I have had bookmarked for quite some time. Actually, I should probably just do away with the bookmarks in this book and just start marking the recipes that I don’t want to do – it would make life easier.

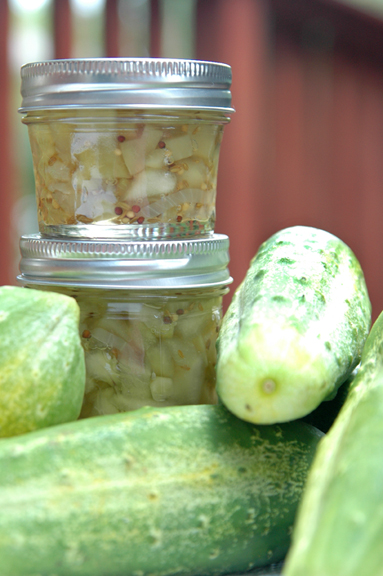
Indian Style Pickle Relish

When you grow your own - they aren't as photogenic.

Indian Style Cucumber Relish (with slight modifications)

The Hardware: see the Canning Thing, slotted spoon, 6 half pint jars (or like I did – 5 half pints and 2 quarter pints).

The Software:
6 C Cucumber (diced, seeded & peeled)
2 C Onions, thinly sliced
1 T Salt, pickling
2 C White Vinegar
1/2 C Sugar
1 T Cumin Seeds
2 t each Brown & Yellow Mustard Seeds
Big pinch whole peppercorns

Put your chopped/sliced veggies in a big bowl and sprinkle with salt – allow to stand for 4 hours (the original recipe said stirring occasionally, I totally forgot this step because I was canning the B&B’s).  Drain, rinse and drain some more. Combine everything else in large, non-reactive, saucepan and bring to a boil over high heat. Add veggies and return to a boil – hold at boil for 30 seconds.

Using a slotted spoon, pack veggie into jars and then ladle liquid over the relish to head-space of 1/2 inch. Boiling water bath for 10 minutes (half pints) 15 minutes (pints) adjust for altitude.

Conclusion:

The reason that I was so excited about this recipe is not exactly about it’s use as a relish – the book suggests it “peps up” meat dishes – but because of another suggestion the authors make. They say you can mix this stuff with yogurt and poof! instant raita. Instant anything from a canned item makes me oh, so happy. And this has given me another idea – can I make a cucumber relish that has all of the flavors of tzatziki so that I can have that creamy deliciousness on demand? Anyone got a recipe close enough so we can tweak it?

The big experiment in my garden last year was tomatillos. Initially I went around looking for tomatillo plants to put in my garden, but every time I asked about them at a garden center I was regarded as if I had two heads. What is this alien to-mah-taho that you are looking for. Eventually I found a package of seeds and decided to take a whirl at starting at square one.

It was quite a steep learning curve. For the non-gardeners out there I will pass over the gory details – but in the end everything came out all right. Better than all right in fact, because I ended up canning many, many jars of Salsa Verde. It was a fairly painful process finding the best recipe to yield the results I desired – but there were no, true, failures. And as per usual, I ended up modifying to get my own.

A baby Tomatillo in my Garden

One of the most disappointing recipes was the one from the University of New Mexico – I thought that if anyone would get it right it would be them, but it was a no go. The flavor was fine, but the end texture wasn’t particularly salsa like. Imagine taking a super chunky salsa, dumping it into a strainer over your sink and allowing it to drain for about 15 minutes – that is the textural quality of the UNM recipe. While it didn’t fly as a salsa – I did use it to great success as a green chili starter. Chuck a jar of it plus a jar of water or stock into a saucepan (or crockpot) along with a can of beans and meat of your choice and you have some delicious chili.

The UNM recipe was the second one I tried – and it turns out the first one was much more successful. From Married with Dinner this Salsa Verde was much closer to what I was looking for – although I can handle much less heat. So for my third try I went back to this recipe and tinkered with it until I produced something I wanted to eat directly from the jar with a spoon. With apologies to the lovely MWD couple – I like mine better.

All of this left me with jars and jars of Salsa Verde for the “off season” months – their consumption a chore to which I applied my most willing efforts. Hence the subject of this “Using It”.

Taco with Tomatillo Salsa

So very much better than Moe's.

Taco Verde

The husband was out of town, but I still felt like busting out the tortilla press and comal to make my own tortillas – because they are simply that much better than store bought. Starting with leftover, shredded chicken in a small saucepan I stirred in enough Salsa Verde to make it saucy and reheated. While that was coming to temp I made the tortillas and from there it was a simple matter of assembly. Tortilla + chicken verde + cojita cheese + Flashy Trout Back baby Romain from my mother’s garden. Wonderfully delicious with a balanced tangy, salty flavor on a corn tortilla that actually tastes like corn. I know my mother probably thought that the tortilla press I asked for for Christmas was going to go into the pile ‘o gadgets-that-looked-like-fun-but-are-actually-a-pain-in-the-butt-and-will-be-in-my-next-yard-sale, but it didn’t. I have been using and loving it since January.

Salsa Verde (You totally thought I was being a tease, didn’t you?)

The Hardware: see The Canning Thing, a food mill, food processor (or a knife you know), 3 to 4 pint jars, paper bag.

The Software:
3 – 3 1/2 lbs of Tomatillos
1 1/2 C Onions, chopped
1 Aneheim Chilie
1 Poblano Chilie
1 T Chopped Jalepeno
6 cloves Garlic, Minced
2 T Cilantro, finely chopped
1T + 1t Cumin
1t Salt
1/8 C Lime Juice
3/8 C Apple Cider Vinegar

Preheat your broiler to High. Peel the husks off of your tomatillos and wash off all of the icky sticky stuff – I use a vegetable brush. Also wash your peppers. Remove their stems and cut the tomatillos in half across the equator, place cut side down on a foil lined cookie sheet. Cut the peppers in half longitudinally and remove stems and seeds, place cut side down on the cookie sheet also – you will most likely need 2 cookie sheets, or do two batches. Whichever floats your boat.

Place under the broiler for about 7 minutes, until they start turning a little bit black/brown on the top. Remove from the roaster and place the chilies into a paper bag or bowl covered with plastic wrap. Drain the liquid from the cookie sheet into a saucepan and dump the tomatillos into a food processor and then chopity chop – don’t puree, but get down to smallish pieces. Dump tomatillios into saucepan. Remove the chilies from the steaming device and remove skin. Chop these puppies up also and put them in the saucepan.

Put everything else except the cilantro into the saucepan and bring to a boil. Simmer for 10 minutes and then pass through a food mill with the big hole setting – do not discard the stuff that won’t go through the mill. Return everything (even the chunkies) to the pot and bring to a simmer, add cilantro and adjust seasonings to taste. The do the canning thing. Leave 1/2 inch headspace and boiling water bath for 15 minutes adjusted for your altitude (here in Atlanta I add another 5 min).

Conclusion:

When I adjusted the seasonings I added some garlic powder and additional lime juice – you can always add more acid to taste, but don’t reduce. Having this in my larder has been a menu changing event. We eat it as frequently as we can, but always keeping an eye on the remaining quantity because we don’t want to run out.

Other uses have included smearing it on the first tortilla into the pan when we make quesadillas, enchiladas and various salsa like applications such as tacos, taco salads and consumption with chips. If you have any other ideas what I can put this on, please let me know!

Things I did well this month:

1) Be a Mommy
2) SCA
3) Keep one step ahead of the Vegetable Garden
4) Knit
5) Crochet

Things that did not go quite as well this month:

1) Updating Blog
2) Can Jam
3) Sleeping
4) Quest for world domination via chickens

I am afraid that canning this month took a back seat to other commitments (and a horrible new obsession called Ravelry). But I did squeeze in a little time for tigress’s can jam theme …erries. And luckily my mother came through with the ‘erries. She trucked down to the Atlanta State Farmer’s Market and picked up a metric butt tonne of strawberries. So many, in fact, that she was unable to process them all and gave a half a flat to me.

This made my choice of ‘errie quite easy because, hey, FREE!!! Now I love strawberries and I really didn’t feel like doing anything creative or fancy – I just wanted to taste Strawberries. So with a complete lack of creativity and originality I followed the instructions in the enclosure for the packages of Sure-Jel low Sugar Pectin.

Mostly.

And I got this:

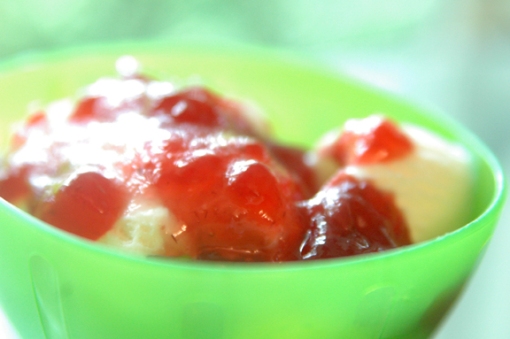
Strawberry Jam on Ice Cream

Move over chocolate, now there's something 'errier!

Which, frankly, I couldn’t ask for more. I can now make my son’s ubiquitous PB&J’s with home-made jam. Totally HFCS free without a mortgage! And I will be on the lookout for Blackberry season to make some plain ole blackberry jam for the same nefarious purpose.

No recipe for today because I really did use the one in the Sur-Jel packet. The only thing I did slightly different is that I didn’t use a potato masher to “mash” the berries. Really, who does that? I tried it, I laid some berries out in a glass pan and took the masher to them – they laughed heartily at my efforts and I was all “That ain’t gonna fly” and chucked them into the food processor. Other than that, it was jam by the book, er, pamphlet, er, insert.

So in conclusion, strawberries are delicious enough to not need to be mucked about with – do you have anything that falls into that category for you?

ps: I hope that someone is seriously considering cucumbers for next month’s theme because I, um … over-planted a wee bit.

Frankly this has not been the best can jam month for me. Right off the bat, the theme(s) this month are not exactly my cup of tea. I appreciate that there was a choice – but for me it was a presidential election type choice. Which candidate do I dislike less, Asparagus or Rhubarb? I am not a huge vegetable fan and there are a lot of veggies that I just flat refuse to try for various reasons, but of the ones that I have tried asparagus is tied right up at the top with green beans for my most loathed vegetable. Rhubarb I have never actually tried.

But rhubarb usually hangs out with my main man strawberry – so it can’t be all bad can it? Here in the south there really isn’t a rhubarb “tradition”, it doesn’t particularly like our climate and has never really gained the “acquired taste we love from childhood” status that I believe it has in other areas of the country. Other colder, norther areas. Added to that I do not care for things that are sour – so rhubarb has never been on the top of my to try list. But again, it has to beat asparagus.

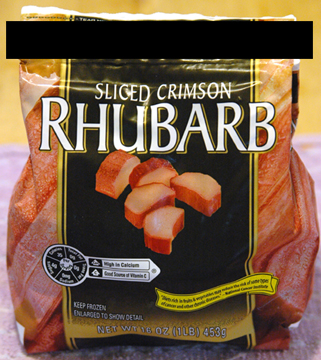
3 Farmer’s Markets and 2 grocery stores later I determine, as did Bread Making Blog Lady, that rhubarb season here in Atlanta was last month. So I bit the bullet and went to the freezer section.

Bag of frozen rhubarb

Oh the SHAME!

I was ahead of the game. I had all of my ingredients ready to go and was going to can yesterday, but alas – this month’s can jam curse was upon me. Instead of a fun day canning with my mother (who brought me a whole flat of strawberries) we spent the first part of the day tracking down the horrid stench in my kitchen. Once we located the source we spent the rest of the day removing, disposing of and cleaning up after the DEAD RAT that had decided the space under my sink cabinet was a great place to shuffle of the mortal coil!

Which leaves me, once again, sneaking in under the wire.  There will be pictures after the mandatory 24 hour no touchie waiting period. Until then, y’all just have to be happy with the recipe. Took a picture – but really, not terribly exciting. I like shooting clear/semi-clear jams better.

Reluctant Rhubarb Chutney: ganked from tigress herself and a recipe over at Country Living

The Hardware: nothing special, check out the canning thing for equipment – this makes four 1/2 pints.

The Software:
1 lb frozen rhubarb (4 C)
2 C Brown Sugar
1 C Apple Cider Vinegar
1/2 C Chopped Onion
1/2 t each ground Coriander and ground Ginger
1/2 t each ground Mustard and Salt
1/3 C each chopped dried Cherries and Apricots
2 T chopped fresh Cilantro

Combine sugar, vinegar and spices in a non-reactive saucepan and simmer until the sugar is dissolved. Add the rhubarb and gently heat until it is no longer frozen. Add dried fruit and bring to a boil, reduce to a simmer and cook for 15 minutes – stirring occasionally. Turn off heat and stir in cilantro.

Proceed to canning process – 1/2 inch head space. Boiling water bath for 30 minutes sea level, adjust time for your altitude.

Rhubarb Chutney on the Deck

Rhubarb al Fresco

In Conclusion:

I have no idea how this tastes. I wouldn’t even know what to eat it with, maybe pork? I have a feeling it will sit in my cabinet until I find some unsuspecting victim to foist it off upon. Or maybe I can con my hubby into eating it, I don’t know. I have a friend who is really into Indian food, maybe she will want it?

Hey, if you think this sounds good – and you promise to give me feedback maybe I can foist it off on you? Drop me a line if you got the cojones.

There has been quite a bit of canning going on around here if you hadn’t noticed, and we have been consuming the canned products. Because that is why we can correct? One of the challenges with canning is that the product is sealed away and it is tough to know if it went well. There is the urge to crack it right back open to see how it turned out, but then there is an equal but oppisite urge to let it sit in the cupboard for as long as possible – because that is the whole point of canning right?

Quite the conundrum.

But we have been eating, and I want to share my thoughts on my results. First off, the citrus fest! The Orange Coriander and Thyme Jelly is delicious, but putting the sprig of thyme in there turned out to be kinda annoying. Sure it looked nice, but it is woody and you just have to pick it out. Next time I will stick with leaves and skip the sticks. And the Kiwi Lemon Marmalade – verrah tasty. Wouldn’t change a thing.

The Thai Basil Pickled Carrots were a big hit – for both of the people who sampled them. I know that a critique of only 2 people isn’t that great, but they each ate an entire jar. I only had 2 jars so I wasn’t able to get any additional opinions. Both tasters said that the carrots had a nice heat to them, but not so much that they were “fiery”. The hubby liked pulling out 3 or 4 and put them on his plate next to his lunchtime sandwich. He ate them straight like a side-dish. He has an order if for me to make more – I am debating trying different sizes and shapes. Spears are one possibility, but I have been thinking about using shredded carrots and making a hot slaw. The possibilities are manifold.

And finally, the B&B Pickled Onions.  It is really nice when something comes out exactly as envisioned.  They work beautifully as a sandwich topper and I cannot wait until grill season gets fire up and we can try them on hot-dogs and hamburgers.  Unlike the cucumber version, with these little puppies a little goes a long way. Next time I make them I believe I will pack and process them in 1/2 pints instead of full pints. You can get so many more onions in a jar when you don’t have those awkwardly shaped cucumbers to wrastle with.

So, there’s the skinny on some canning results. My big problem now is to figure out what to do for this month’s can jam. Citrus and Alliums inspired me, carrots challenged me – but in a good way. This month, well this month we have the choice between a vegetable that I categorically despise and a fruit that I loathe only slightly less than the vegetable. It really isn’t looking good for me.

For this month’s can jam the theme is Herbs! tigress and the awesome food in jars lady picked this out for us, and yet again it is a challenge. Challenge narrowing down the choices that is. I adore herbs, I would be hard pressed to select my favorite, but my favorite(s) usually involve tomato sauce, it is the Italian in me that screams for the red. And it is so not tomato season yet – so I will have to wait.

Once again I find myself turning to my hubster for inspiration. Out of nowhere I ask him “What’s your favorite herb?”. Accustomed to these sort of non sequiturs  from me he takes it in stride. After some thought he says “Mint”.

Spring is Green, Green is Spring!

Mint it is!

I went through a phase last fall where I was obsessed with the idea of herb jellies. Where most canning recipes are adamant about following them exactly or oh my GOD you are going to kill your friends and family with the BOTULISM and they will put you in canning JAIL, the herb jelly recipes actually encourage playing a little fast and loose with the ingredients.

Woo Hoo.

And what encourages more fastness and looseness than RUM*?

Mojito Jelly: adapted from Herb Jelly recipe in the Complete Book of Small-batch Preserving

The Hardware: see The Canning Thing, makes 4 half pints with a little left over – so if you have a 1/4 pint jar it would be a good thing, strainer & coffee filter.

The Software:
3/4 C Water
1/2 C Light Rum
Bunch of Fresh Mint
3 1/2 C Sugar (I think I might have goofed up here but more on that later)
1 C Fresh Squoozed Lime Juice (10 limes – which weighed in @ 2 lbs total weight)
2 T Lemon Juice
1 T Additional Rum
1 Pouch Liquid Pectin

Combine3/4 C water with 1/2 C rum in a large saucepan. Add in mint. The original recipe called for 2 T of mint – and really who the heck are they kidding? I bought a big bunch and pulled the leaves off and threw them in the pot until it looked like enough. And for me “enough” was so that I pretty much couldn’t see the liquid any more, I figure it was probably a loosely packed 1/2 C or tightly packed 1/4 C. Put in enough to get your mojo working.

Bring to a boil and then turn the heat off. Cover and allow to steep for awhile. The original recipe said 5 minutes – I am guessing I gave it 20. Put your strainer over a liquid measure and line with your coffee filter, pour in mixture and allow to drain. Pick up the filter and squeeze gently to get all of the liquid out and discard the filter. Measure out 1 C of the mint infused liquid and put in a large non-reactive cooking pot on the stove.

I am going to assume that you already squoozed your limes – I nuked mine for 30 seconds to get more juice out of them. Add all of the other ingredients except the liquid pectin to the pot and crank up the heat. Stir pretty much constantly until you reach a full rolling boil that cannot be stirred down. That is totally “jamming” speak and what it means is the stuff is going to foam up like boiling lava and unless you stir it like the bejeebus it is going to overflow your pot and turn your range into a disaster area. That is why you need a big pot. Way bigger than you ever think you could possibly need.

Once you have reached the “full rolling boil” dump in the entire pack of liquid pectin. If you haven’t used liquid pectin before – here is a trick. Have a short glass that the pouch fits in sitting beside the stove. Cut the top all the way off before you get started and set it in the glass so it doesn’t tump over. Now you can just pick it up and squeeze it in without fiddling with anything because hey, molten lava sugar is not the time go dinking around with your pectin packet. The pectin will knock back your boil, but keep on stirring – it will revive shortly and shut down European air space.

Once you have regained FRB set a timer for 1 minute and maintain FRB while stirring for 1 full minute. Then turn off the heat. Do the canning thing and fill your jars with the goodness. Leave 1/4 inch headspace and BWB for 10 minutes – adjusted for your altitude. It takes 15 at my house, your house may vary.

The Good, the Bad and the … there was no Ugly I guess

I am pretty sure I left out 1/2 C of sugar in my measuring. I was lazy and measured directly into the pot, which is like measuring salt over your mixing bowl while baking. DON’T DO IT, IT’S STUPID! I think I lost count and missed a 1/2 cup somewheres. We will see how well the jellies set and that might let me know. The thing that makes me really think I whoopsed it is that I ended up with 4 half pints plus about 3/8 of an inch in a 5th jar. The recipe said it would make 4 half pints and a quarter pint – and this book is usually spot on the mark with quantities.

Regardless of the renegade sugar, since I had the small amount left I was able to taste the jelly straight away. And it was tasty, refreshing even. I think the rum played a background part and the balance of the mint and lime is really nice. When I make this again I might swap the quantities of water and rum and see what happens (btw, I checked and rum has a ph level considerably lower than water so I didn’t hose anything with the substitution), it might even be possible to leave the water out altogether. But I am not sure that would be a good idea – who knows? After I finished canning I took the leftover jar down to the hubster with a little tasting spoon, he said he liked it. I had to run out the door and pick up my little man from pre-school and when I returned the leftover jar was in the sink with the spoon – empty. Which I will take to imply he wasn’t lying. He ate it all, with a spoon.

For full disclosure – I am not much of a drinker and have never tasted a Mojito. I have no idea if this jelly tastes anything like a Mojito – one of you boozers will have try it and tell me how they compare. So, do you have a favorite cocktail that we could jellyfy?

*Arguably one could say Tequilia, but we do not keep that in the house.

This theme got me all riled up when it was revealed. Allium is  one of my favorite food families – I love most every member of the clan. The possibilities stretched out before me as an endless plain. Why then am I posting just under the wire?

I was stuck in bad thinking.

Brainstorming, I kept trying to come up with something special. Trying to second guess what other can jammers might be doing. Attempting to come up with something that would really wow everyone. Then I realized how monumentally stupid I was being.

That isn’t what can jam is about.

Can Jam is about learning. About challenging ourselves to simply get into the kitchen once a month and can something. About devoting this time to our kitchens, our blogs and therefore ourselves. Once I figured this out I knew what I was going to make. Something that would be a valuable addition to my pantry. Something that I would actually EAT.

There is no actual relevance of the towel

My husband and I love my mother’s Bread & Butter Pickles. But one of the observations we invariably make to one another as we are fishing the golden little coins out of the jar is that we like the onions in there as much if not more than the cucumbers. And then I tell my Hubby that some day I will make a batch with no Cucumbers at all.

Today was that day!

Garlicky Bread & Butter Onion Pickles

The Hardware: canning stuff, this makes 4 pints of pickles – so get your jars on!

The Software:
16 C Sliced onions (’bout 1/4 in thick)
1/4 C Coarse Salt
4 C Ice
7 Cloves of garlic, sliced thinly
2 1/2 C Apple Cider Vinegar
2 1/2 C Sugar
3/4 t Tumeric
1/2 t Celery Seeds
1 T Mustard Seeds

Combine Onions, Salt and Ice in a large bowl; or you could simply use the non-reactive cooking vessel that you will eventually cook the pickle in, your choice really. Simply ask yourself how many dishes you want to wash? Stir well and then cover and weight down. If you are like me this will involve dirtying half of the plates in your kitchen trying to find one that fits down in your pot. That time you saved not dirtying that bowl? Wasted. I used a giant can of pumpkin for weight – because I stocked up during the great Pumpkin Shortage Scare of ’09.

Allow the sqooshed onions to sit for 3 hours and then drain well. Pick out any remaining pieces of ice. DO NOT RINSE.

Combine everything else in the dirty pot and stir together. Add onions back into pot. On medium heat, bring almost to a boil – stirring frequently. And by almost to a boil I mean until you start to get all of those simmery bubbles coming up around the edges but not the middle. Of course you are gonna have to stop stirring to see this happen – so don’t stir too much.

Turn off heat and use a slotted spoon to pack the onions into your hot canning jars. You are gonna have to moosh the onions down lightly and then ladle the pickling brine into the jars up to about 1/2 inch head-space. Use a chopstick to poke around the edges and center to make sure you get all the bubbles out and top off with more brine if necessary.

Boiling Water Bath for 25 minutes for 1K altitude. Adjust for your height!

Conclusion:

For only the second time in my canning career (of almost a year now woo hoo!) I had a jar fail to seal. I don’t think I left enough head-room, which is why I said 1/2 inch. I left 1/4 inch and I don’t think that was enough.

My hubby was very consoling. He said that we will just have to put them in the ‘fridge and eat them sooner rather than later. He was willing to make that sacrifice for me and I am appreciative. Of course he made this offer as he was fishing out the straggler onions from the brine with chopsticks and stuffing them in his face.

I cannot wait to eat these on Hot Dogs, Hamburgers, Pastrami Sandwiches … can you think of anything else I can put them on?

Either Doris or Jilly has a mean streak. I don’t know which one is responsible, but Carrots? Really? Yes indeed. The theme foodstuff for this month’s installment of the tigress can jam is carrots.

A vegetable.

A low acid vegetable.

This is haaaaaaard. OK, quitcha bitchin girl and get a grip. Truthfully I found myself not particularly inspired by this theme, but I guess that is why this is a challenge eh? I spent a goodly amount of time poking around books and the intarweb to try and figure out what to do. I explored carrot jams, carrot chutneys, carrot slaw like applications … and carrot pickles.

I procrastinated. I waited until the week of and went through the entire list of participants on tigress’s blog to see what the early birds were posting. Finally I girded my loins and did what I do best.

Deferred the decision. Since I would more than likely not be eating any carrot based item I canned – I asked my hubby what he would prefer. Would he like something sweet or savory? The decisive answer was savory. Would he want something slaw-like or a pickle? Again, a decisive decision in the pickle direction. So now I had somewhere to start! Yay!

I settled on a recipe in what is probably my favorite canning book: The Complete Book of Year-round Small Batch Preserving.

Floaters - how do you avoid floaters?

She has a recipe that uses those little lathed out mini-carrots that you can buy anywhere anytime. So I got to pickling.

Not one to leave well enough alone – I tinkered with the recipe. I didn’t want to mess with the acidity so I looked at the constituent parts. The original recipe called for fresh oregano, I figured I could substitute any fresh herb in similar quantities. The original called for chopped bell peppers in two colors, again, if I maintained ratios any pepper should do. And if I add more acid that can’t hurt right?

So here it is, it’ll take a month for my hubby to let me know if they are any good.

Spicy Thai Basil Carrot Pickles

The Hardware: standard canning stuff see The Canning Thing this will make 2 pint jars. Wide mouthed is best. A vegetable peeler and a pair of chopsticks will be handy also.

The Software:
4 medium leaves fresh Basil
2 Limes
1 lb peeled “Baby” carrots
6 Thai chili peppers
2 cloves Garlic
1 1/2 C White Vinegar
1/2 C Sugar
1 t Pickling Salt

Wash all of your produce and then nuke your limes for about 20 seconds on high. Using a vegetable peeler, remove two 1/2 inch wide strips of zest from tip to tail on your best looking lime. Cut limes in half and juice into a liquid measure (if you are like me – cuss because you didn’t realize you had several small cuts on the ends of your fingers), if necessary add water until the quantity reaches a total of 1/3 C.

Put lime juice, vinegar, sugar and salt into a small saucepan over medium heat and start on it’s way to a boil. Peel your garlic cloves and start two little piles. Add two clean basil leaves to each garlic clove and be happy that your piles are growing. Take the two strips of lime zest and cut them into thinner strips – divide between the piles.

Wearing at least one glove, use a sharp knife and cut the stem ends off of the peppers and then cut a small slit in the length of each chili – add three chilies to each pile. If you haven’t figured it out yet – each pile is going to go into one of the two pint jars that you have hanging out in your BWB.

Regard your carrots. If any of them seem to be a bit chunky for the “Baby” moniker – cut them in half lengthwise. It is a harsh diet – but it has to happen. Once your pickling liquid is almost to a boil, remove the jars from the hot water. Place the basil leaves neatly covering the bottom of each jar – I use chopsticks to futz with them because HEY THESE JARS ARE HOT.

Once you have the basil the way you want it, add the lime zest and garlic. Then start arranging “Baby” carrots. I found it easier to lay the jars on their side and stack the little impudent buggers in there. When I got to halfway full on the first layer I put two of the chilies in vertically on opposite sides from one another. Then I finished filling in carrots. I took the third chili and put it in the second layer of carrots.

Repeat process with second jar. Sit upright and fill with the boiling liquid – leave 1/2 inch head-space. Put on lids and rings and then lower into BWB. Begin timing after you have regained a full boil – process for 15 minutes (Sea Level) I did 20 minutes because I am over 1K feet. You can do your own math for wherever you live.

All that futzin with the chopsticks?

Not a good look for garlic.

Pointless. As usual with raw pack things – it all floated up to the top and shifted and stuff. My carefully arranged vegetable masterpieces look like a 5 year old did them. One of these days I will learn the secret of  packing jars so that they don’t end up floaters – but it wasn’t this day.

Also – did you know that garlic turns a fairly icky blue/green color when it is pickled? Not nice. Not nice at all. And basil? Not lovely. It looks kinda kelpy and possibly slimy. Did I mention that I will so not be eating these?

I am looking forward to next month – when my hubby will let me know if these are edible. Until then – I recommend that you bookmark this page and wait and see before you try this yourself.