Tonight for dinner I practiced a bit of desperation cooking. It is the kind of cooking where you have to eat something, but you really don’t feel like doing anything creative, or interesting, or even that is actually cooking. Luckily I have a toddler that is in his “I can live on Air and Milk” phase. I tried to be nice to him today and got him one of his favorite foods – Chick-fil-A. Long story short … I ended up with a CFA sandwich that had approximately 2 gnat sized bites taken out of it in my ‘fridge.

So I asked myself “What would Sandra Lee do?” and then I started “cooking”. I fished around in the back of the freezer and came up with 6 cubes of frozen spaghetti sauce and tossed them into a saucepan with some olive oil and garlic. Then I arranged the piece of CFA on a cookie sheet flanked by it’s buns (I peeled off the pickles and ate them). Sprinkled some garlic powder on the buns and some shredded mozzarella on the chicken and then slapped them all into a cold oven. Fired it up to 350 and put some water on to boil for spaghetti.

Yadda, Yadda, Yadda … Faux Chicken Parmesan.

I am ashamed.

Not looking so embarassing after all

Not looking so embarassing after all

But, it makes me feel much better about posting this meal, which I previously thought might be too boring/pedestrian to blog about. Obviously standards are not something that I am really strict about around here.

Pork Cutlet Parmesan

So lets talk about the Tyranny of Chicken. Perhaps it is the fact that Veal is both expensive and gauche that has led to the rise of Chicken Parmesan – but somehow the poultry lobby has managed to make any other version of a “Parmesan” dish nigh on unthinkable.

That is not to say that I bust out the boxed baby cow for a home meal – moral beliefs aside, I am too much of a cheapskate. But I do believe if I can pound it flat, bread it, pan fry it, and put some cheese on it then it is a viable candidate for inclusion in a “Parmesan” dish.

When my spelunking adventure into the freezer unearthed pork cutlets – the game was on!

A Process

Take chubby pieces of meat that are roughly the size of your closed hand (like you are going to give someone a high 5, not Jazz hands) and place them on a piece of plastic wrap. Place another piece of plastic wrap on top of them and whack the bejeebus out of them with something heavy and flat.

Not literally, you actually have to be kinda careful about not tearing the meat – but it isn’t hard. Just thwack it with something and get it flatter – now we are looking for Jazz Hands size. Do the breading thing to your pieces of flattened flesh.

The Hardware:
Skillet with oven-safe handle containing a kinda thin layer of vegetable oil and an oven preheated to 350ish.

The Breading Thing

Set up three containers with the following mixtures:
1: A beaten Egg
2: A mixture of Bread Crumbs (I am all snooty and like Panko, because nothing says Italian Breaded Meat like Japanese bread crumbs) and Parmesan cheese.
3: A mixture of plain ole flour, salt and pepper, (if you likea the espicy you can adda some red peppah).

I like having 1 & 2 in Tupperware type containers – boxes, you know something with high sides to contain the mess. 3 can just be on a plate – it isn’t crucial. When breading you need to remember that wet stuff sticks to dry stuff. So to start with your meat is wet so you want to dip it into the flour first – not to heavy, just a dusting. Then you dip it into the beaten egg to get it wet so that the dry crumbs will stick to your cutlet. From the egg mixture you move to the breadcrumb mixture – I tend to pat it to get things good and stuck to each other. I also just like fiddling with things.

If you are doing a small number (I tend to be doing 2) place them directly into your oven-safe skillet with a goodly layer of hot vegetable oil shimmering away. (Do we need to talk about melty handles again?) Let the first side get good and brown and crispy then flip them over. Chuck the whole skillet into the oven and it will brown on the other side. When it is close to being done open the oven and sprinkle whatever kind of cheese on top that tickles your fancy – I tend to always have mozzarella around the house, but I wouldn’t kick provolone out of bed.

I really cannot tell you how long to cook the things because I don’t know how efficient your pounding is. It won’t take to terribly long. Make sure you have your pasta on the boil and about ready to go and that your sauce is pretty much done and just bubbling happily on a back burner. The cutlets can sit for a bit while the pasta is finishing – but you don’t want to lose the crispy. I mean, isn’t that what it is all about? Plate your pasta, sauce to liking and top with crispy meat cutlet.

Voila! Fancy pants dinner; if Fancy Pants to you is Olive Garden, and considering the frequency of my dining out Olive Garden might as well be Sotto Sotto.

Recently my cooking has not been very exciting, hence my lack of posting anything here. I feel like it must be exciting for me to post it here because really, who wants to hear about my umpteenth iteration of fried rice. Cooking for one is simply not conducive to creativity. If one makes too much guess who is stuck eating all of something that might not have been the wisest flavor choice? Me, that’s who. Because lord knows that the Eman ain’t eating it if it isn’t nugget shaped or covered in syrup.

This is where other blogs come in – they can figure it out for me.

I love Smitten Kitchen. I know, me and eighty billion other people, but hey – that many people cannot be wrong can they? So the other night I turned to her for dinner and I ended up eating this:

Peanut Sesame Spaghetti

Her recipe can be found here: Peanut Sesame Noodles/Smitten Kitchen

Since I was cooking only for myself I monkeyed around with it quite a bit, first off cutting it in 1/2.

Not Quite Smitten Kitchen Peanut Sesame Noodles

Hardware: skillet, big pot to boil spaghetti, stirring type utensil

Software:
2 Shallots, chopped finely
1 Carrot, peeled and coarsely grated
3 T Smooth Peanut Butter
2 T Soy Sauce
1/3 C Warm Water
1 1/2 t Ginger, fresh
1 t Garlic, minced
1 T Rice Wine Vinegar
2 1/4 t Sesame Oil
1 T Oyster Sauce
Smidge of Garlic Chili Sauce
Dry pasta of your choice – I used spaghettini

First off, SK had all kinds of “delicious” vegetables in her dish, which is fine and well for people who find vegetables “delicious”. I do not. I have to force myself to eat veg, and the ones I will eat are limited. Shallots count and you will not convince me otherwise. I started out by sauteing the shallots in some olive oil (you can use whatever oil tickles your fancy) until they got a little brown. While that was happening I mixed everything else up in a liquid measuring cup and whisked it together to get it all loosey goosey.

When I felt the shallots were considering going all nuclear on me I poured in the sauce mixture and stirred like crazy. Then I set about fiddling and tasting and adjusting things to my taste. You will have to do that for yourself. Also, I set a pot of pasta on to boil before I started any of the proceedings. You remembered to do that, right?

I love using grated carrot. It saves me from having to use my pathetic knife skills and it also needs minimal to no cooking. I put the grated carrot directly into my serving bowl and then dumped a serving of the drained, cooked pasta directly on top of the orange ribbons. About 1/2 of the sauce I had made went over top of the whole shebang and I stirred it together well with hot tong action. Actually, I tried to do the fancy pants lifting and twisting to combine thing that Hot Shot Mario Batali does on his cooking show (why of why did you steal my Molto Mario Food Network – curse you **shakes tiny fists at sky**) and it didn’t work out so good for me.

Unlike SK I ate it hot – and I didn’t even have the sesame seeds for garnish, so I couldn’t forget to toast them. A couple of days later I reheated the sauce (with added water) and tossed it with some frozen breaded shrimp that I baked in the oven. Served it over rice and it was just as tasty as the first time around.

I know that it wasn’t as fancy as what you did, but Thank You anyway Mrs. Kitchen.

ps: I have been wondering what this would taste like with Cashew Butter – anybody want to try it and let me know?

Another non-recipe recipe, aren’t you excited? This is, bar none, my absolute favorite side dish for steaks. I have mentioned my Mother here before, and she is the one who taught me this dish, but I don’t think I have mentioned my Father. Dad is not much for cooking, he has a couple of specialties and requires a sous chef  when doing anything complex – but man-o-man can he grill a steak. I don’t know if it is on the Y chromosome but I did not inherit the talent. My family’s cut of choice is the Rib Eye and there is minimal gussying up of the meat but it turns out divine.

Once you have that slab of meat on your plate you don’t want to mess it up with anything too fancy, and that is where onions and mushrooms come in.

The Non-Recipe for Mushroom and Onions:

The Hardware: skillet, spoon, maybe a lid

Method:

Slice up a couple of onions – how much depends on how much you wanna make. (See, not a recipe)
Heat up some vegetable oil in a large skillet and toss in your onions. Stir frequently until they soften nicely.
Add in a couple of boxes of fresh sliced mushrooms, you want a fairly equal proportion of onions to mushrooms. (Still not a recipe)
Salt lightly to encourage release of liquid and continue stirring every so often. Add oil if it seems like you need it.
Add a couple of spoon-fulls of chopped garlic – to taste (nyah, nyah, nah-nah)
Cook until everything is all nice and caramelized. The mushrooms should have shrunk by between 1/2 & 2/3 their original size, come to think of it – so have the onions. If you want to hurry things along you can cover with a lid once there is a goodly bit of liquid. Add salt and pepper to taste, if you want to be totally decadent you can cook it in butter.

You serve this with your steak and spear a bit of onion & mushroom with every bite of steak. Better than any sauce that exists.

But that isn’t the subject of this post now is it? See, I made something tonight with the leftovers that is going to encourage me to make mushrooms & onions just so I can have the leftovers to make this:

Have you ever craved leftovers?

Have you ever craved leftovers?

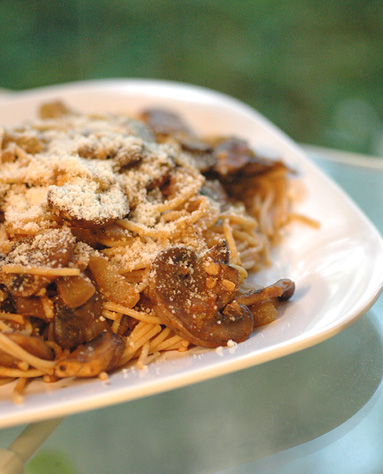
Leftover mushrooms & onions + ~1/4 C tomato sauce (2 frozen cubes from my Foray into India) + shake of Italian Herb Blend + Salt & Pepper + Spaghetti = Delicious! Just enough tomato to bind it together a bit and I added in some of the pasta cooking water to loosen the mix. I mean really, it was so much better than I expected it to be.

Are there any dishes that you make that you think you might anticipate the leftovers more than the meal itself?

Within the recent past (last few years or so) I have overcome one of my deep seated childhood food revulsions, beans. For the longest time I could not get past the texture. Something about the smushiness combined with the resistance of the skin gave me the willies.

But no longer.

And when I discovered that I no longer despised beans, I kind of went on a bean bender. I wanted beans with every meal, I tried every kind of bean I could get my hands on. My new obsession with beans lasted almost 9 months, and then I was burnt out. If beans were in something I would not reject it out of hand as I had before, but I no longer sought beans out with the determination of a bloodhound.

Now, I have found a happy medium. Beans are a part of our weekly diet, but they are not in every meal. At times they are bit players and at times they are the star attraction. This dish is so deeply satisfying that it does not allow you to lament the fact that you are eating a meatless meal. And it makes rocking leftovers.

Beans and Pasta, how can one go wrong?

Beans and Pasta, how can one go wrong?

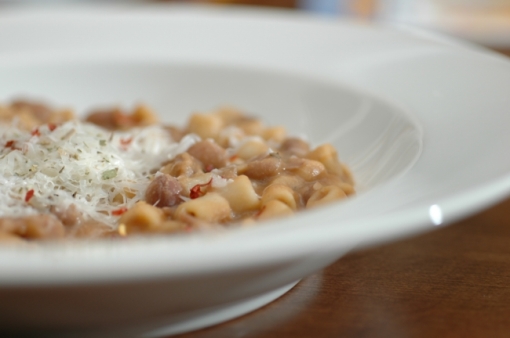
Pasta e Fagioli

Adapted from Nigella Cooks

The Hardware:

Large Saucepan or small stockpot, Saute Pan, Blender, Tea ball (optional)

The Software:

1 lb Dried Cranberry Beans
1 T + 1 t Chopped Garlic
2 – 3 Sprigs Rosemary
1 Bay leaf
1 Onion, chopped
1 T Tomato Paste
2 C Chicken or Vegetable stock or Water
7 oz Ditalini
Parmesan Cheese
Olive Oil
Salt & Pepper to taste

1) Wash and pick through beans, soak overnight or for at least 6 hours.

2) Pour some olive oil into a large saucepan (or small stockpot) and sauté onions until just browned, add 1 T garlic and sauté briefly. Add beans and cover with water 2 inches over beans.

3) Place 2 sprigs of Rosemary and Bay leaf into the teaball and hang into pot. If you don’t feel like being all fancy with the teaball then you can use a sachet – which to me seems even fancier. Nigella tells you to put it into a knee-high stocking but I think that is kinda creepy/nasty. Bring to a boil and then simmer for 1 hour. Check periodically and after beans are tender add salt to taste. Start with less then you think you will need, you can adjust at the end.

4) When the beans are nearing the end of cooking, clean and mince additional rosemary, at least 1 teaspoon – more if you like. Remove 1 C of beans from the pot and put them in your blender. Puree them well, you might need to add a little of the cooking water. While doing this, bring the beans back to a boil with the addition of 1 C of stock or water and add pasta.

5) While pasta is cooking, bring a tablespoon or two of olive oil to medium heat in a sauté pan add 1 t garlic and sauté slowly until it begins to roast a bit then add the tomato paste, minced rosemary, some salt and some pepper. Sauté briefly and then add the pureed beans and stir together well. Turn heat to low and allow to blend, if it takes too long for the pasta to cook go ahead and turn the heat off of the sauté pan and let it hang out.

6) When the ditilini is al dente, add the pureed bean mixture back to the big pot and stir well. If it seems too thick add more stock or water. Continue cooking at a simmer until the pasta is completely tender. Adjust seasonings as you like.

7) Serve in a bowl with grated parmesan and if you like a little heat, a sprinkling of red pepper flakes.

Potential Hacks:

I have made this with a mirepoix mixture in the beginning and it turns out just as nicely with the added bonus of more veggies in the dish. You could also increase the amount of tomato paste if you wanted to up the tomatoey quotient.

There are as many recipes for this dish are there are Italian mamas, and I do not claim to be an Italian mama. One of the significant variations between versions is it’s end thickness. In some interpretations you get a tomatoey broth with beans and pasta floating about among a variety of veggies. In other interpretations you could slice yourself off a chunk like cold macaroni and cheese.

Your best bet is to tinker with this until it makes you happy. The only thing you need to be careful about is when you add the salt. If you add salt at the beginning of the cooking process your beans will take forever to soften, if they soften at all. Don’t know why, if you find out let me know O.K.?

Close Up